Mechanical Keyboards 101
I’m sure you’ve heard about “mechanical keyboards” at some point, or you may even have one right in front of you now. Could you tell me what parts a mechanical keyboard is made of? And why does almost everyone recommend them over any other option?
Today my goal is for you to fully understand why mechanical keyboards exist and to build a solid opinion about them. I’ll tell you in advance that you’ll probably want one after reading this article, but which one?
Don’t worry, at the end of this post I leave you both links to parts/builds and references to websites and tech channels that talk about these gadgets.
What is a mechanical keyboard?
Let’s build the house from the foundations. What is a mechanical keyboard? Well, it’s the keyboard we’ve known forever, literally.
The first mechanical keyboards, although very different from today’s, were invented in the 19th century. The exact year is somewhat open to interpretation, since the first patent for a mechanical keyboard was registered back in the 1710s, but they did not start being used commercially more frequently until one hundred years later.
These primitive mechanical keyboards were used in typewriters, and it was not until 1874 that the first one with a QWERTY layout was built.
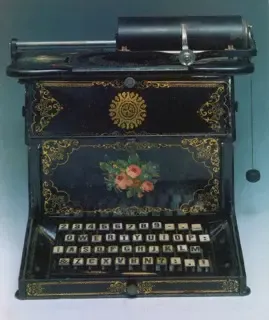
Ultimately, a keyboard is mechanical when it contains moving parts that trigger “mechanisms” when they receive an input, such as a key press.
Broadly speaking, in typewriters, pressing a key activated a lever that stamped the selected letter on a sheet of paper; nowadays, pressing a key activates a switch that emits an electrical signal and that signal is registered by a computer.
Later on, I’ll explain all the parts of a modern mechanical keyboard in detail.
What is a membrane keyboard?
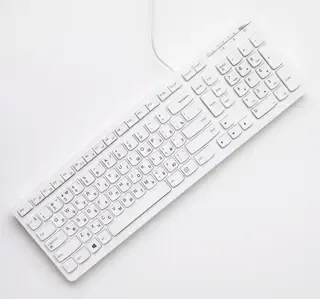
After mechanical keyboards were created (with a clear target on typewriters), membrane keyboards were invented (around the 1970s), now much more based on electronics and focused on computers.
This keyboard variant was invented with the premise of replacing those noisy and stiff mechanical keyboards that existed for many years; they made barely any noise when pressing keys, the feel was soft and spongy, everything pointed to membrane keyboards being here to stay and become kings of the sector.
These keyboards did not have moving parts like mechanical ones. Instead, under each key they had a small polyester membrane that, when you pressed the key, made contact with the motherboard and closed the electrical circuit, thus sending a signal to the computer.
🥊 Mechanical keyboard VS Membrane keyboard 🥊
Who wins the battle for the title of best keyboard type? Well, you’ll see, it’s not that easy and I’ll explain why.
Feedback and tactility
A very important aspect of a keyboard is the feedback each key provides when pressed; whenever feedback is correct, we’ll know whether the key was pressed successfully or not.
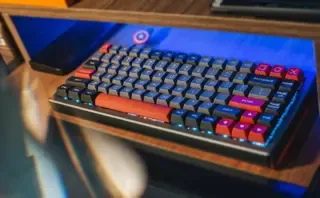
In this section, mechanical keyboards have a clear advantage because they have moving parts that produce physical clicks when they rub against each other.
Size and weight
Mechanical keyboards have always been heavier and larger than membrane ones. This is because each key has its own switch, and as I’ll show you later, these are larger and heavier than a small polyester membrane.
This is convenient for certain types of use, for example gaming. If the keyboard is heavy, you know it won’t move when you apply pressure in the middle of a video game match.
However, a heavy keyboard does not let you rearrange your workspace as easily, nor move it between different places.
In this section, membrane keyboards take the lead by weighing less and usually being thinner.
Customization and accessibility
Membrane keyboards cannot compete in this section, because it is not easy at all to assemble a custom one. The normal thing is to use it exactly as the manufacturer sells it.
On the other hand, mechanical keyboards are famous for their customization capacity using parts from different brands that can be bought separately.
Depending on your budget and the time you want to invest, you can have a basic and functional mechanical keyboard or another one that looks like a piece of art worthy of being in a museum.
Price
Membrane keyboards have fewer parts than mechanical ones, and therefore their manufacturing and build process is cheaper in comparison. This translates into lower prices for consumers.
Mechanical keyboards, although in recent years they have adapted to all budgets, still present a big entry barrier for anyone who simply wants a device that works for typing on a computer.
Although today we can find decent mechanical keyboards for around 40€, membrane keyboards will keep being the protagonists with options around 10€.
Conclusion
As we can see, both mechanical keyboards and membrane keyboards have pros and cons. However, for many people, mechanical keyboards are without a doubt the option to choose for any type of use, as long as you don’t have a budget that is too tight.
In my opinion, whenever I can, I’ll use mechanical keyboards because of their feel and how well they transmit the sensation of pressing the key you want to press. Of course, I also choose mechanical ones because of their extensive customization.
Parts of a mechanical keyboard
As I told you before, a mechanical keyboard has many more parts per key than a membrane keyboard. That’s why I think it’s necessary to list and describe each of the most important parts that make one of these up.
Knowing the parts of a mechanical keyboard will also help you understand certain aspects I’ll tell you later in this post.
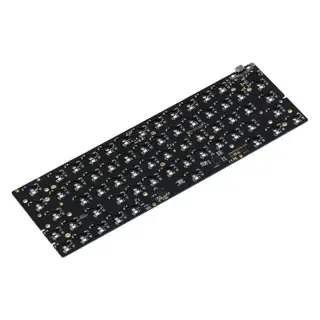
- PCB (Printed Circuit Board): This is the board that receives keypress signals and sends them to the computer.
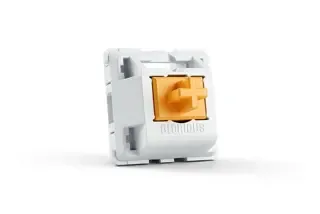
- Switch: This is the actuator for each key. Pressing it activates the key signal to be sent to the computer. There are many types of switches that we’ll see later.
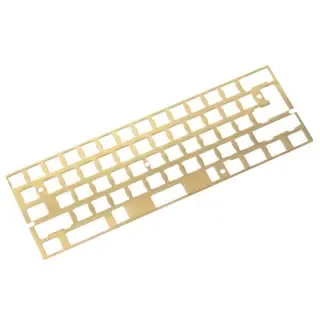
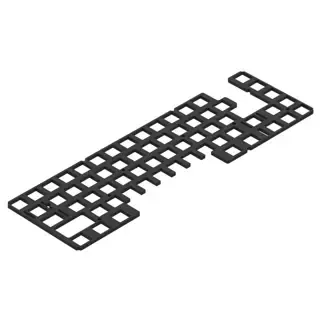
- Plate: This is an intermediate part placed between the keys and the PCB. It is used to align the switches better.
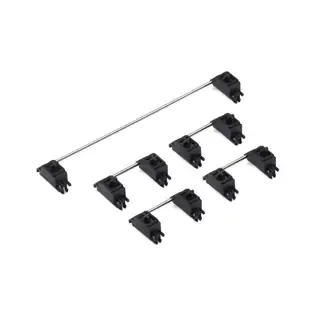
- Stabs (Stabilizers): These are parts placed under longer keys and they allow that, when pressed from one side, the key does not sink only on that side but rather moves uniformly across it.
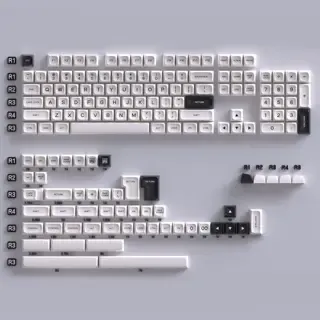
- Keycaps: This is the part of the keyboard you press. They cover the switches and have printed characters.
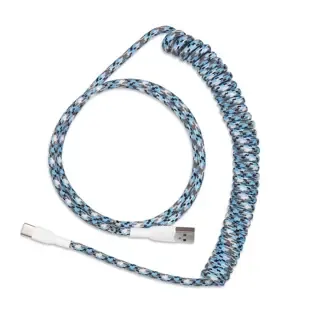
- Power cable: This is the cable that connects the PCB to the computer.
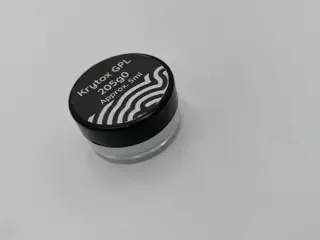
- Lubricant: This is a substance used, especially in custom builds, to smooth the friction between certain switch and stab parts.
- Case: This is the box where all components are placed; it is the keyboard’s outer structure.
- Foam: This is a foam piece with the same size as the PCB and it is placed under it. It absorbs unpleasant sounds and vibrations.
- Gaskets: These are small foam or rubber pieces used for the same purpose as foam, absorbing sounds and vibrations. They are placed around the plate and cushion the pressure from the upper part of the case.
Size matters
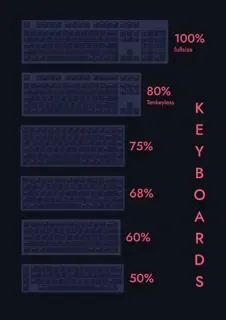
Depending on how you want to use your keyboard, it can come in different sizes and key configurations. The most famous sizes are:
- 100% Full size: Contains function keys (F1 - F12), numpad, and all other keys.
- 80% TKL (Ten key less): Does not include a numpad.
- 75%: Same as TKL but more compact; the arrow keys are integrated inside the main key structure and not separated.
- 65%: Same as 75% but without function keys (F1 - F12).
- 60%: Same as 65% but without Home, End, PgUp, PgDn, Insert, and Delete keys.
- 50%: This is a very compact keyboard that requires learning to be used. So many keys are “missing” that you need to memorize shortcuts to use all functionalities.
For programming
For programming, I advise not going below TKL since it keeps keys well separated from the rest. However, a 75% would not present any major inconvenience either.
For gaming
A 65% keyboard is my recommendation for gaming. It’s small, so it allows mouse movement across the whole desk. Even so, it keeps the function keys that may be important at some moments to run certain keyboard shortcuts.
For travel / transport
The smaller the better, but in my opinion, 50% presents a huge entry barrier and learning curve, so I recommend 60%.
Switch types
There are several switch types and actuation technologies.
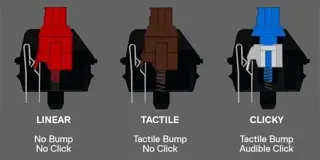
Linear
The linear switch is the one that does not present variations in feel or sound during its action. It is a uniform movement that has no tactile or audible “click.” They are very good for gaming because they offer no resistance to complete the click.
Tactile
The tactile switch is the one that has a small bump in the middle or at the end of its action travel, which helps notice the key was pressed correctly.
Even so, although a tactile switch has a small bump in its travel, it is a smooth switch with a very subtle sound. It is the best option for programmers and people who spend most of their PC time typing.
Clicky
The clicky switch is the one that forces a slowdown in its travel, and right after that it unlocks to complete it. This means that halfway or at the end of the keypress the switch resists and then gives a “snap” toward the bottom, releasing a loud sound and giving intense feedback that the key was pressed correctly.
This switch is just as good for programming and writing as a tactile switch, so the choice between those two is entirely up to consumer preference.
Keycaps
Keycaps are one of the most important parts of a keyboard because they are its visible and tangible face. If a keycap is low quality, it will develop a worn look and an unpleasant feel.
There are several types of keycaps and they can be grouped by plastic type or manufacturing process.
Plastic type:
- ABS: This is the cheapest plastic type. It develops shine on the top due to wear from finger contact.
- PBT: This is the most expensive plastic type. It is more durable and higher quality.
Manufacturing process:
- Single-shot mold: Usually PBT is used. A mold is used for a single plastic layer. This means the key legend needs to be printed with ink. This can cause it to fade over time.
- Double-shot mold: Usually ABS is used. A mold is used for two plastic layers. The first layer has a cavity with the key legend shape, and the second layer fills this cavity. This makes it impossible for the legend to fade.
As you can see, ABS is a more “inferior” plastic than PBT, but PBT has a “worse” and “less” durable manufacturing process. I include all these adjectives in quotes because this is a generalization. Both a good ABS set and a good PBT set will always be very good options with barely any differences between them.
QMK and VIA, programmable boards
Mechanical keyboard (custom) boards are programmable, so you can choose the behavior of each and every key. This is because not all custom keyboards are the same, and they may not have the same keys or have them in the same positions.
To program a keyboard board, open source software called QMK is usually used (as long as the board is factory-compatible).
There is an add-on for QMK called VIA. VIA allows changing each key behavior one by one without updating the device firmware. All changes made through VIA are saved inside the keyboard itself, so it is not necessary to redo configurations when it is turned off.
Where to buy components to build a custom keyboard?
Having said all that, it’s time to see where to buy components for a custom build.
Recommended kits for beginners
Whenever we talk about custom kits for beginners or people who have never assembled a custom build, we should think about hot-swappable switches and lubricating as few parts as possible. This way there is less chance of doing any step wrong and ruining some component or the whole build.
I recommend using switches in any of these keyboards according to their intended use. As I mentioned before, I recommend linears for gaming and tactiles for writing/programming.
I also want to clarify that all these configurations are completely to my taste and don’t have to be the best or cheapest. You should always look for an interesting quality-price ratio and, of course, what looks nicest to you.
Full size
Full-size custom builds are quite rare to find, but there is one that stands out above all others: the Glorious GMMK ISO Barebones for $54.99.
This kit allows a total of 104 switches and contains:
- PCB
- Case
- Braided power cable
Extras:
- Glorious Panda : $34.99 x 3 units = $104.97 (Lubed) or $24.99 x 3 units = $74.97 (Unlubed)
- Krytox GPL 205g0 $14.99 (buy only if unlubed switches are chosen, or if you want to lube the stabs)
- Ink Rhyme Varmilo Keycaps $80.00
Complete build price (at the time this post was written): $254.95 (counting factory-lubed switches + Krytox for the stabs).
TKL
TKL custom builds are somewhat more common than full-size ones, but even so, finding them with ISO Spanish layout is still very unusual. Because of that, I recommend relying once again on PC Gaming Race with the Glorious GMMK ISO Barebones for $54.99.
This kit allows a total of 87 switches and contains:
- PCB
- Case
- Braided power cable
Extras:
- Kailh Silver : $33.76 (Unlubed)
- Krytox GPL 205g0 $14.99 (buy only if unlubed switches are chosen, or if you want to lube the stabs)
- PBT Carbon OEM Dye-Sub $39.99
Complete build price (at the time this post was written): $143.73.
⭐️ 65%
We arrive at my favorite corner of mechanical keyboards. For me, 65% builds are the sweet spot in keyboard size because they are compact enough, but not so much that you feel shortcomings when using it.
Again, we trust a kit led by the Glorious GMMK ISO Barebones for $79.99, only in this case it’s version 2.
This kit allows a total of 68 switches and contains:
- PCB
- Case
- Braided power cable
Extras:
- Glorious Panda : $34.99 x 2 units = $69.98 (Lubed) or $24.99 x 2 units = $49.98 (Unlubed)
- Krytox GPL 205g0 $14.99 (buy only if unlubed switches are chosen, or if you want to lube the stabs)
- Ink Rhyme Varmilo Keycaps $80.00
Complete build price (at the time this post was written): $244.96 (counting factory-lubed switches + Krytox for the stabs).
60%
60% builds are the most common in the community, but that doesn’t mean finding an ISO kit is easy. Quite the opposite. These builds are loved by most enthusiasts for their compact size and ease of handling on the desk.
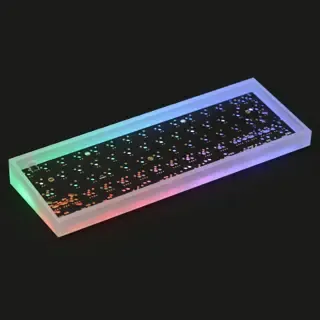
The BM60 kit from KPRepublic is one of the best quality-price options for beginners, and although its case is made of plastic, it is hot-swap, has RGB, supports QMK, its power cable is USB-C, and it has ISO layout. What more could you ask for?
This kit allows a total of 63 switches and contains:
- PCB
- Stabs
- Aluminum plate
- Plastic case in black, white, or translucent
- 70 switches of choice (for an excellent quality-price build, I recommend Gateron Yellow)
- Coiled power cable
Complete build price (at the time this post was written): $87.20.